How to resize an image on Mac, crop it and compress it
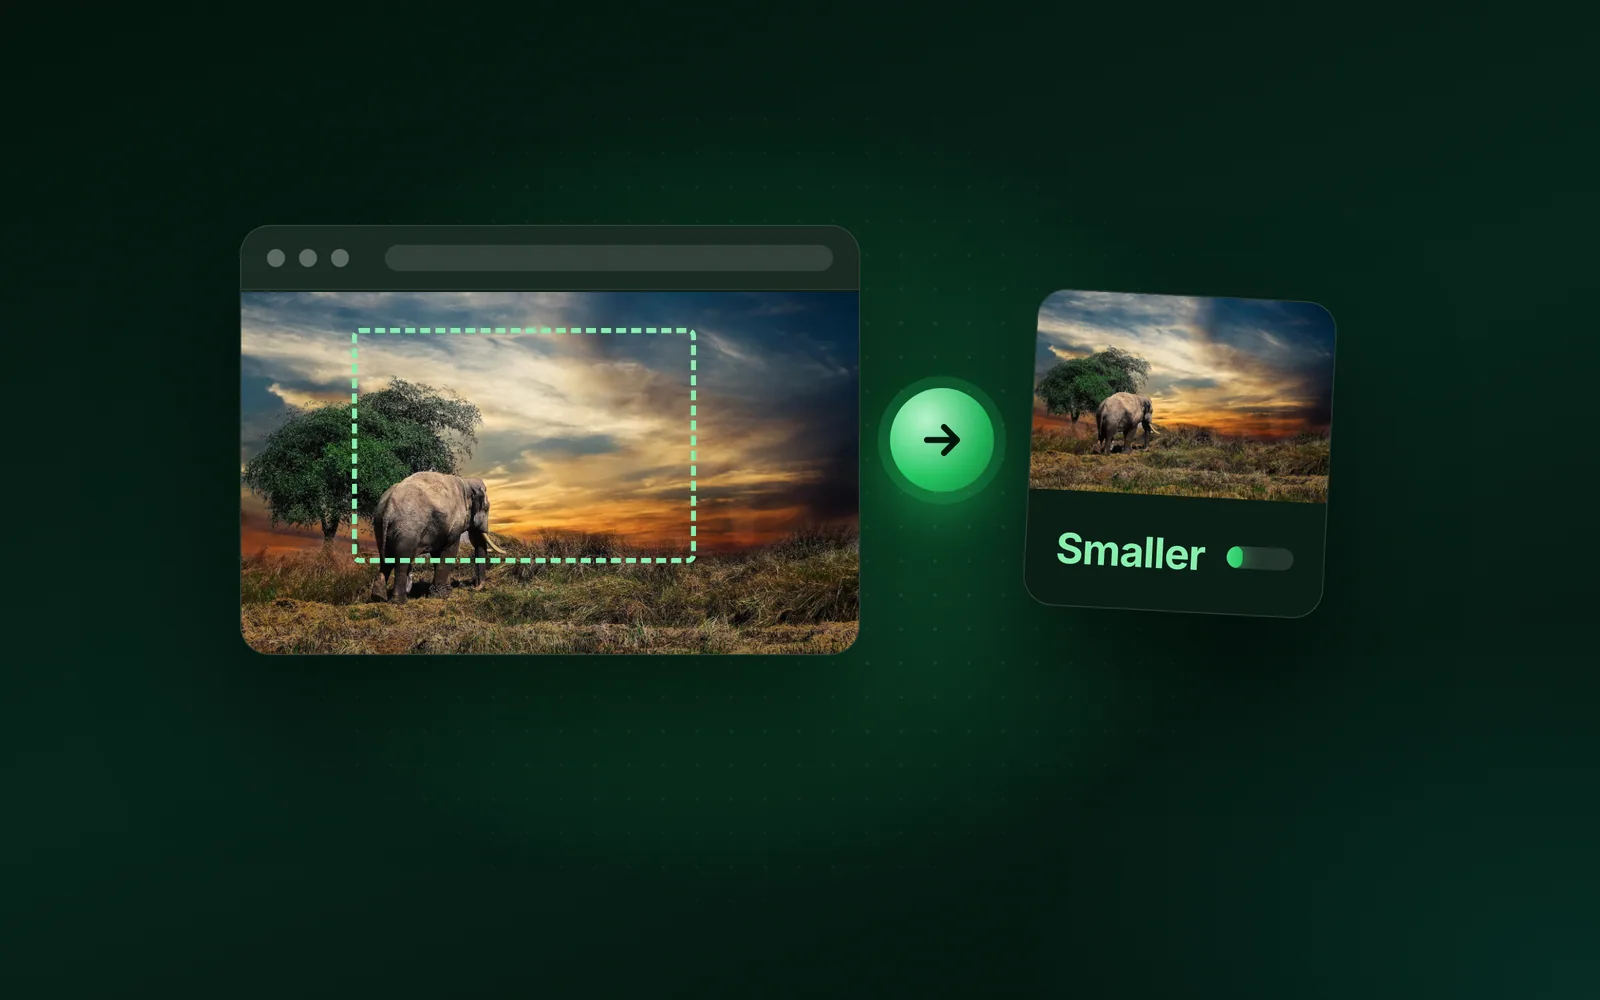
How to resize an image on Mac: open it in Preview and use Tools, Adjust Size for exact pixels. Crop it to keep only the part you want. For a smaller file in MB, use File, Export and its Quality slider. Here are the main built-in routes, in Apple’s own steps. We ran our 9.8 MB photo through sips, the image tool built into every Mac, on macOS 26.5.1. Part of the image resizer.
By Sahadat HusainUpdated 14 min readGuides

How to resize an image on Mac: the short answer
Start with what you need to change. For exact pixels, use Preview’s Adjust Size. For one part of the picture, crop it in Preview or Photos. For a smaller file in MB, use Export and its Quality slider. Three questions lead you to the right tool:
Do you want only part of the picture?
- Yes
Crop in Preview or Photos
Preview: Tools, then Crop, or Command-K. Photos: press C.
- No
Do you need exact pixels?
- Yes
Preview’s Adjust Size
Tools, then Adjust Size, with Resample image ticked.
- No
Many files at once?
- Yes
Preview’s sidebar or sips
Select them all in Preview’s sidebar; sips takes a folder.
- No
Export with the Quality slider
File, then Export, then JPEG.
- Yes
- Yes
Apple’s guides give the same Preview and Photos steps for macOS Tahoe 26 and macOS 27. Only Finder’s Convert Image gains a step in macOS 27. Here are the main built-in routes and what each changes:
| Route | Fewer pixels | Smaller MB | Many files at once | Apple’s guide |
|---|---|---|---|---|
| Preview, crop | Yes, it cuts | Yes, by fewer pixels | Not stated | Yes |
| Preview, Adjust Size | Yes, any size | Yes, with Resample image | Yes, in the sidebar | Yes |
| Preview, Export | Not in the steps | Yes, JPEG quality or HEIC | Yes, in the sidebar | Yes |
| Photos, Crop | Yes, it cuts | In an exported copy | Not stated | Yes |
| Photos, Export | Yes, the Size menu | Yes, JPEG | Yes | Yes, no sizes named |
| Finder, Convert Image | Apple: “a smaller size” | Not stated | Not stated | Yes, macOS 12 and later |
| Terminal, sips | Yes, any size | Yes, any quality | Yes, a folder | Man page only |
How to crop an image on a Mac in Preview
Select the part you want to keep, then click Crop, and Preview discards the rest. These are the steps from Apple’s Preview guide:
Show the Markup toolbar
Open the image in Preview. If the Markup toolbar is hidden, click the Show Markup Toolbar button.
Click Rectangular Selection, then drag
Drag over the part you want to keep. For an exact size, choose Tools, then Show Inspector, open the Crop Inspector and choose a unit.
Click Crop
Click the Crop button in the Markup toolbar. On macOS 26.5.1, Preview’s own menu also lists Tools, Crop with Command-K, though Apple’s shortcut page leaves it out.
Preview saves the crop into the file you opened. In Apple’s words, “Preview automatically saves changes for you as you work.” To keep the original, choose File, Duplicate first and crop the copy.
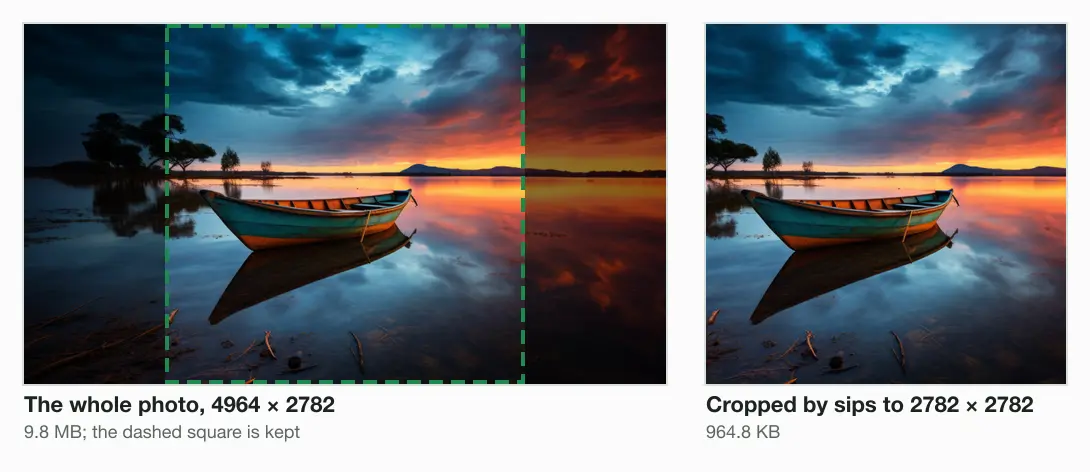
How much does a crop save? We cut the middle square from our 4964 × 2782 photo with sips, the command-line image tool built into macOS. The 2782 × 2782 square came to 964.8 KB, against 9,804.3 KB for the whole photo. The square keeps 56% of the pixels but only 10% of the bytes. That is because sips also saves a new JPEG at its own default quality.
Crop images on Mac in Photos
Photos keeps the original, “so that you can always undo your changes”, in Apple’s words. The steps, from Apple’s Photos guide:
Double-click the photo, then click Edit
Or select its thumbnail and press Return.
Click Crop, or press C
Apple’s shortcut list for Photos gives C for a crop.
Pick a shape, or drag the frame
The sidebar holds the aspect ratios. Apple names Square, 4:5, 16:9 for high-definition video, and Custom.
Click Done
To go back at any time, choose Image, then Revert to Original.
A crop “changes its appearance everywhere in Photos”, Apple warns. To keep both versions, choose Image, Duplicate 1 Photo (Command-D) and crop the duplicate. On macOS 27, Photos adds Extend and Reframe under Tools. Apple offers both “With Apple Intelligence”, which its page, read on 4 October 2026, says is not available in all languages or regions.
The library’s original never gets smaller, so a smaller file is an exported copy. Apple’s Photos export steps say “Choose File > Export > Export [number] Photos.” Then set the Photo Kind, the JPEG Quality and the Size. Apple names no sizes in pixels.
Resize an image on Mac: Preview’s Adjust Size
Adjust Size sets an exact width and height in pixels, and Apple’s steps for a smaller file start there too. In Preview:
Choose Tools, then Adjust Size
For several images, open them in one window and select them in the sidebar first.
Keep Scale proportionally ticked
Change the width and the height follows, so the picture keeps its shape.
Choose pixels or percent, then type the width
The unit menu sits next to Width and Height. Or choose a size from Fit into. One side may then come out smaller than the size you chose, to keep the proportions.
Tick Resample image, then click OK
“The new size is shown at the bottom,” Apple says, so you see it before you click.
Like a crop, Adjust Size changes the file you opened, so duplicate it first to keep the original.
Unticked, Resample image makes the dimensions smaller “without losing any detail”, Apple says. To reduce the file size, Apple’s steps tick it, then enter a smaller value in the Resolution field.
How to compress an image on Mac: Export and the Quality slider
Export saves a new copy at the format and quality you choose. The file you opened stays as it was. The steps from Apple’s Preview export page:
Choose File, then Export
For several images, open them in one window and select them in the sidebar first.
Pick a format
Apple lists HEIC, JPEG, JPEG-2000, OpenEXR, PDF, PNG and TIFF. Hold Option as you click the Format menu for older formats. WebP and AVIF are not in Apple’s list.
Lower the Quality slider
“If you choose JPEG or JPEG-2000, you can adjust the image’s quality,” Apple says. A lower quality makes a smaller file.
Name the copy, then click Save
Choose another folder if you want the copy somewhere else.
What a lower quality did to our photo
Apple gives no file sizes for the slider’s positions. So we used sips, which takes the quality as a percent, on the same 9.8 MB photo. Every pixel stayed; only the quality changed.
| File | Size | Smaller than the original |
|---|---|---|
| The original camera JPEG | 9,804.3 KB | None |
| sips, JPEG quality 80 | 2,433.7 KB | 75% |
| sips, JPEG quality 60 | 1,390.7 KB | 86% |
| sips, JPEG quality 40 | 817.9 KB | 92% |
| sips, HEIC at its default | 852.2 KB | 91% |
| Blinkimg, JPEG at Auto | 605.5 KB | 94% |
At sips quality 60, quality alone cut the file by 86%. The photo kept every pixel and fell from 9.8 MB to 1,390.7 KB. As a sips HEIC, it came to 852.2 KB. Apple’s quality sentence names JPEG and JPEG-2000 only, so it does not say whether HEIC gets the slider.
Convert from the Finder: Convert Image
Convert Image changes an image’s format or size from the Finder, without opening an app. Apple’s Finder guide gives these steps:
Select the image in the Finder
Apple’s steps start from one selected file, on the desktop or in a Finder window.
Control-click it, then choose Quick Actions
The same actions sit as buttons at the bottom of the Finder’s Preview pane.
Choose Convert Image, then a format and a size
On macOS 27, click More first. Apple’s example turns an iPhone .heic photo into a .jpeg or .png.
Apple first documents Convert Image for macOS 12 Monterey. Apple does not state the sizes in pixels or the formats beyond that example. Nor does it say how many files one run takes, or where the new file goes. We did not measure Convert Image either, so no sizes for it appear here.
For many images at once, two routes have documented steps. In Preview, select every image in the sidebar, then use Adjust Size or Export as for one. In Terminal, sips resizes a whole folder in one line.
Resize from Terminal with sips
The sips command is built into macOS and runs in Terminal. Its name stands for “scriptable image processing system”. Apple’s support site has no page for it, so its manual, man sips, is the guide. These two lines resize and compress a copy:
# 1600 wide, height to scale: 1600 × 896, 216.0 KB
sips --resampleWidth 1600 photo.jpeg --out photo-1600.jpeg

# Quality 60, every pixel kept: 4964 × 2782, 1,390.7 KB
sips -s format jpeg -s formatOptions 60 photo.jpeg --out photo-q60.jpeg- -Z 1600 fits the longer side to 1600 pixels, for portrait and landscape photos alike.
- -c 2782 2782 crops to a height, then a width. With no offset, our square came from the middle.
- -g pixelWidth -g pixelHeight prints the size, so you can check the result.
- sips --formats on macOS 26.5.1 lists AVIF and HEIC as formats it writes, and WebP as one it only reads.
Many files at once with sips
Give sips several files and a folder after --out. The folder must exist first; sips stopped with an error when it did not.
mkdir resized
sips -Z 1600 *.jpeg --out resizedWe ran it on 2 copies of our photo. Each came out 1600 × 896 at 216.0 KB in the new folder, and both originals stayed as they were.
How much smaller each size makes the file, measured
Fewer pixels make a smaller file, and the encoder decides how much smaller. We resized our 9.8 MB, 4964 × 2782 photo to 5 widths with sips on macOS 26.5.1. Here is the photo at each width, drawn to one scale:
- Original4964 × 2782, 9.8 MB
- 3024 wide3024 × 1694, 654.2 KB
- 2048 wide2048 × 1147, 328.7 KB
- 1600 wide1600 × 896, 216.0 KB
- 1280 wide1280 × 717, 151.9 KB
- 1080 wide1080 × 605, 113.9 KB
Through our engine at Auto, the same widths came out about half the size of the sips files:
3024 wide
- sips, 3024 × 1694654.2 KB
- Blinkimg at Auto, 3024 × 1695283.4 KB
2048 wide
- sips, 2048 × 1147328.7 KB
- Blinkimg at Auto, 2048 × 1148155.1 KB
1600 wide
- sips, 1600 × 896216.0 KB
- Blinkimg at Auto, 1600 × 897104.9 KB
1280 wide
- sips, 1280 × 717151.9 KB
- Blinkimg at Auto, 1280 × 71773.6 KB
1080 wide
- sips, 1080 × 605113.9 KB
- Blinkimg at Auto, 1080 × 60556.7 KB
At 1600 wide, sips saved 216.0 KB and Blinkimg 104.9 KB, 51% smaller. Across the 5 widths, the engine’s file was 50% to 57% smaller. At some widths the heights differ by a pixel. In our runs, sips rounded the height down and the engine to the nearest pixel.
Is the gap the resize or the encoder?
The encoder. To test it, we resized the photo to 1600 wide once and kept those pixels lossless. Then we gave the same pixels to both tools. At its default quality, sips saved 239.7 KB; Blinkimg at Auto saved 104.9 KB.
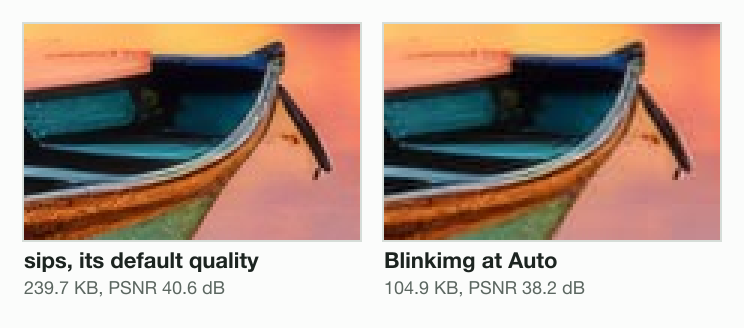
PSNR measures how close the pixels stay to the source, and higher is closer. The sips file keeps more detail: 40.6 dB against our engine’s 38.2 dB. The sips file pays for that with 2.3 times the bytes. Here the sips file weighs 239.7 KB, not the 216.0 KB in the bars. The reason: sips encoded pixels we resized, not pixels it resized itself.
Reduce image file size on Mac without an app
Apple documents no Mac tool that takes a target size, such as under 1 MB. In a browser, the reduce image size in MB tool lands at or under the number you type. The image compressor saves at Auto, and resize image sets exact pixels.
For iPhone photos in HEIC, HEIC to JPG converts them for sites that ask for JPEG. For the phone itself, read the guide on how to resize an image on iPhone. That guide covers Preview on iOS 26 and later.
Read the full guide: How to reduce image file size on any device.
Questions
- How do I reduce the MB size of a photo on Mac?
- Open it in Preview, choose File, then Export, pick JPEG and lower the quality. Fewer pixels cut more: choose Tools, then Adjust Size, with Resample image ticked. With sips, our 9.8 MB photo fell to 1,390.7 KB at quality 60, every pixel kept. At 1080 wide it fell to 113.9 KB.
- How do I resize an image to specific dimensions on a Mac?
- Open the image in Preview and choose Tools, then Adjust Size. Choose pixels in the menu next to Width and Height, keep Scale proportionally ticked and type the width; the height follows. For a new shape, crop to that shape first. In Terminal, sips with --resampleWidth does the same for one file or a folder.
- Why can’t I crop my photo on Mac?
- In Preview, a crop needs a selection first. Click Rectangular Selection in the Markup toolbar and drag over the part to keep. A locked file cannot be edited, so unlock it before you crop. In Photos, click Edit first, because Crop sits in the editing toolbar. Apple documents no other cause for a crop that fails.
- How do I snip an image on a Mac?
- Press Shift-Command-5, then drag the edges of the frame around the part you want and capture it. Click the thumbnail that appears to open Markup, where the Crop tool trims it further. Apple says screenshots save as PNG files. On macOS Tahoe 26 or later, an HDR Capture Format saves HEIF instead.
- How do I compress a PNG image on a Mac?
- Apple names a quality control in Preview’s Export only for JPEG and JPEG-2000, so a PNG needs another route. Give it fewer pixels with Tools, then Adjust Size. Or export it as JPEG, if it has no transparent parts. For a smaller file that stays a PNG, use a web image compressor instead.
- How can I resize a photo to 3 MB on a Mac?
- Apple documents no Mac tool that takes a target size. Lower the quality in Preview’s Export, or the pixels with Adjust Size. Then check the result: Tools, then Show Inspector lists the file size. With sips, our 9.8 MB photo fell to 2,433.7 KB at quality 80, under 3 MB with every pixel kept.
- How do I resize an image without cropping it on a Mac?
- Use Preview’s Adjust Size with Scale proportionally ticked. The width and height then change together, so the whole picture stays in the frame. The Fit into menu keeps the proportions too. Apple notes that one side may come out smaller than the size you chose. Nothing is cut away from the picture.
- Does cropping in Preview replace the original image?
- Yes. Preview saves changes into the open file as you work, so the crop replaces what was there. Choose Edit, then Undo Crop to reverse it at once, or File, then Revert To, then Browse All Versions later. To keep both, choose File, then Duplicate before you crop the image.