Highlight part of an image: spotlight one area, dim the rest
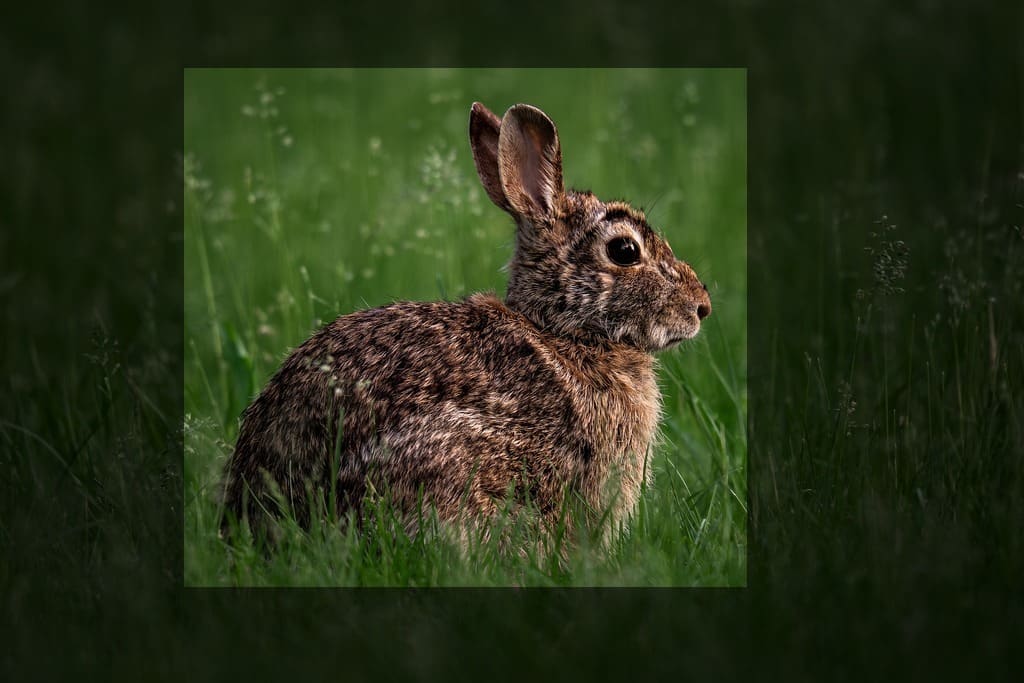
Drop an image and the editor opens on Regions with Spotlight pressed. Drag a box around the part that matters. Everything outside it dims under 55% black, so the eye lands where you point. Save, and the file comes back compressed. One of the image tools.
Output format
– / –
Drop images or browse
JPEG · PNG · WEBP · AVIF · HEIC · up to 50 at once · max 30 MB each
HEIC
PNG
JPEG
AVIF
WEBP
Advanced settings1 on
SmallerAutoBetter
Auto tunes each image.
A hard cap for the number your form demands.
KB
A floor for forms that refuse small files.
Max resolution
×
Empty side keeps the ratio. Never enlarges.
A real spotlight, before and after
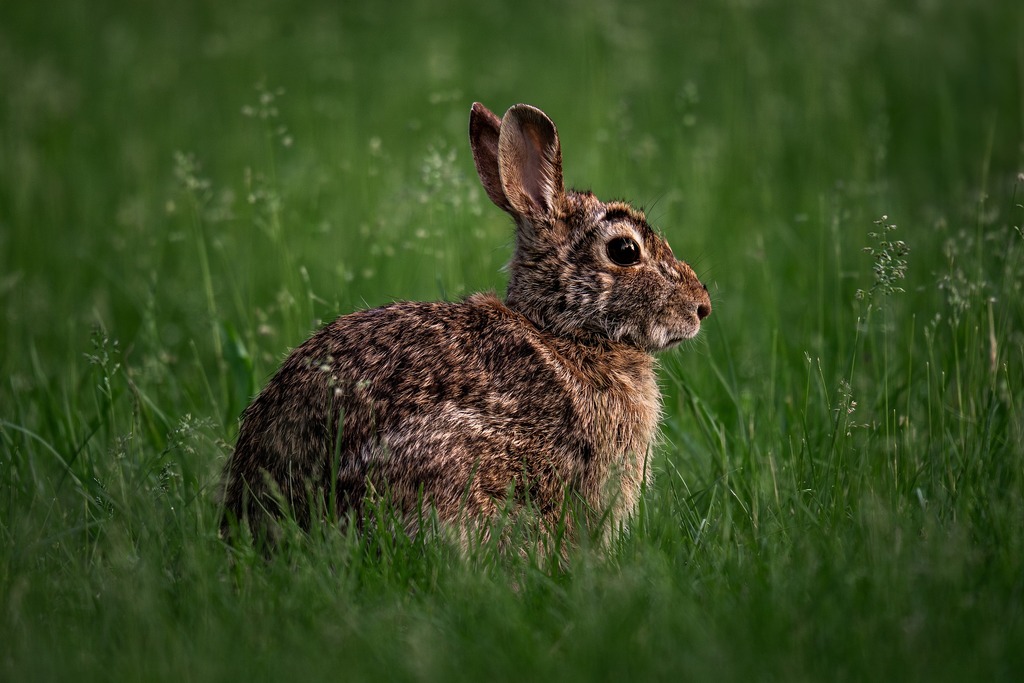
Original · 166.8 KB
Spotlight, the rest at 55% · 67.1 KB
−60%
One of our photographs, actually given a spotlight in the editor and saved by our engine; the sizes are the real files'. Drop your own image and do the same.
How it works
Drop, highlight, save
Three steps, no account. The file leaves smaller than it arrived.
01
Drop
Drop an image and the editor opens on Regions with Spotlight pressed.
02
Highlight
Drag a box around the part that matters. The rest dims under 55% black.
03
Save
The highlighted file comes out optimised, in the format you chose.
How do I highlight part of an image?
One drag. The editor opens on the Regions tab with Spotlight pressed, so the first box you draw is the highlight. Drag round the part that matters and everything outside it dims under 55% black at once. Drag the box to move it, pull its corner to resize it, and press Delete or its cross to remove it; Undo steps back through every change. Add an arrow, a text label or a badge from the Objects tab if the picture needs words. Save hands back the file compressed, in JPEG, PNG, WebP or AVIF.
How much does the rest of the picture dim?
To 45% of its brightness: the editor lays 55% black over everything outside the box, in one even layer. That is dark enough that the eye goes to the bright box first, and light enough that the rest still reads, so a screenshot keeps its context and a photo keeps its scene. The amount is fixed, so ten screenshots in a tutorial match without a setting to copy between them. The box itself is untouched: its pixels leave exactly as they came in.
Spotlight, arrow or crop: which points best?
Each of the 3 does one job. A crop removes everything but the part, which is right when the rest is noise and wrong when the reader needs to know where the part sits. An arrow points without hiding anything, which works on a clean picture and gets lost on a busy one. A spotlight keeps the whole picture and lowers everything but the part, so the context stays and the noise drops. On a busy screenshot, use the spotlight and add a short label from the Objects tab; on a clean one, an arrow may be enough.
Does a spotlight change the file size?
A spotlight made our photograph 11% smaller. It shows a wild rabbit sitting in green grass. As JPEGs at 92, it exported at 166.8 KB as it came and 148.9 KB spotlit. Quality 92 was the editor’s JPEG step before 5 October 2026. Dimming does not remove detail, it lowers its contrast, and a JPEG spends its bytes on contrast in fine detail: the same grain at 45% brightness costs less to encode. A screenshot with large flat areas has little to save and shrinks less. Our engine then saved the spotlit photo at 67.1 KB, the file in the figure at the top of the page.
What the JPEG measured
File
What changed
Size
Our photograph, exported
Nothing
166.8 KB
Spotlight, exported
The rest at 45% brightness
148.9 KB
Spotlight, saved by our engine
The rest at 45% brightness
67.1 KB
Source: one of our photographs, a wild rabbit sitting in green grass, at 1024 × 683. One box round its subject kept bright, and 55% black over the rest, the way the editor draws a spotlight. The exports are JPEGs at 92, as the editor saved them before 5 October 2026. The last row is the file our engine made.
Every byte count is the size of an actual file, not an estimate. A row marked exported is the picture as a JPEG at 92, the editor’s save before 5 October 2026. The engine’s row is the file the engine produced from that JPEG. The photograph is one of our own. Drop your own file into the tool above to rerun any of them. How we measure names the sources and the settings.
Is a spotlight the same as a vignette?
No, though both darken. A vignette, on the Color tab, shades the edges of the whole frame with a soft gradient centred on the picture, whatever it shows: a mood, not a pointer. A spotlight shades everything outside a box you place, evenly, wherever the box sits, even in a corner. A portrait wants the vignette; a screenshot, a product shot or one face in a group wants the spotlight. They combine: a light vignette under a spotlight softens the frame’s edges as well.
Can I highlight two areas in one picture?
Not with 2 spotlights: each one dims everything outside its own box, so the second dims the first, and both end up darker than the rest should be. Two ways work. Draw one box that takes in both areas, which keeps them bright together with whatever lies between. Or keep one spotlight on the main area and point at the second with an arrow or a badge from the Objects tab. For a step-by-step guide, one screenshot per step with its own spotlight reads better than one crowded picture.
When a spotlight is the wrong tool
Something in the picture must stay hidden?
A dim still shows it. Pixelate it instead, or crop it out.
The rest of the picture adds nothing?
Crop to the part. A smaller picture says the same thing with no dim.
A round glow or a coloured dim?
Not here: the spotlight is a rectangle under 55% black. The Vignette slider darkens the edges softly.
Short answers specific to this tool. Try it above and the editor settles the rest.
Q:How do I highlight part of an image?
Drop the image and the editor opens on Regions with Spotlight pressed. Drag a box around the area you want seen, and everything outside it dims under 55% black straight away. Undo takes the box back if you want another. Save hands back the result compressed, as JPEG, PNG, WebP or AVIF.
Q:Can I highlight more than one area?
One spotlight at a time works best. Each spotlight dims everything outside its own box, so a second one dims the first. To show two areas, draw one box that takes in both, or keep one spotlight and point at the other with an arrow or a label from the Objects tab.
Q:Is the spotlight effect free, with no watermark?
Yes. The highlight tool is free with no signup and no watermark, with the same daily allowance as every tool on the site. The dim is drawn in your browser. We keep nothing: the saved copy is processed and wiped automatically, and it carries none of the photo's EXIF metadata, GPS location included.
Q:How dark does the rest of the picture get?
The editor lays 55% black over everything outside your box, so the rest keeps 45% of its brightness. Shapes and large text there stay readable, but they read as background, and the eye goes to the bright box first. The amount is fixed, the same on every picture, so a set of screenshots matches.
Q:Can I highlight part of a screenshot?
Yes, and it is what the spotlight suits best: the button a tutorial is about, the total on a receipt, the line in a log. Drop the screenshot, drag the box round the part that matters and save. The rest of the screen stays visible for context, only dimmed, so nobody loses their place.
Q:Can I add an arrow or a label next to the highlight?
Yes. Switch to the Objects tab after the spotlight and add an arrow, a text label or a badge, in the same session. They draw on top of the dim, so a label sits clearly even outside the box. Every object moves and resizes on its own, and Undo covers them all.
Q:Will the highlight move if I crop or rotate the image?
It stays on the part it covers. A box is fixed to the picture, not the screen, so a crop, a quarter turn, a flip or a straighten carries the spotlight with the content. If a crop cuts through the box, the part left inside the frame stays bright and the rest stays dimmed.
Q:Can I make the spotlight round or change its colour?
No. The spotlight is a rectangle and the dim is black at 55%, on purpose: an even, familiar look that works on photos and screenshots alike. For a softer, rounded darkening of the edges, the Color tab has a Vignette slider. For a coloured frame round the whole picture, use the border tool.
Q:What is the difference between a spotlight and a vignette?
A vignette darkens the edges of the whole frame with a soft gradient, centred, whatever the picture shows. A spotlight darkens everything outside a box you draw, evenly, wherever the box sits. Use a vignette for mood on a portrait, a spotlight to point at one thing. Both live in the same editor.
Q:Can I blur the background to focus on part of an image?
Not with a blur: the editor has no background blur. The spotlight does the same job with light instead. Drag a box round the part that matters and everything outside it dims under 55% black, so the eye lands there first while the rest stays readable. For soft, darker edges, the Color tab has a Vignette slider.
Q:Does highlighting make the file smaller?
On a photo it can. Before 5 October 2026, our photograph weighed 166.8 KB as the editor's JPEG at 92. With one spotlight round its subject it weighed 148.9 KB, 11% less. Dimming lowers the contrast of the fine detail outside the box, and a JPEG spends fewer bytes on low contrast. A plain screenshot saves less.
Q:Can I highlight part of an image on a phone?
Yes, in the browser. Open the highlight tool, tap the drop zone and pick the image; the editor opens with Spotlight pressed, and a finger drag draws the box. A HEIC photo from an iPhone needs one conversion to JPG first, because the editor does not open HEIC yet; the converter link appears when you drop one.