How to crop an image in Photoshop 2026, step by step
To crop an image in Photoshop, press C, pick a ratio on the options bar, drag the handles and press Enter. We cut every preset from our 9.8 MB camera photo and measured what each one keeps. Part of the image cropper.
By Sahadat Husain14 min readGuides

How to crop an image in Photoshop 2026
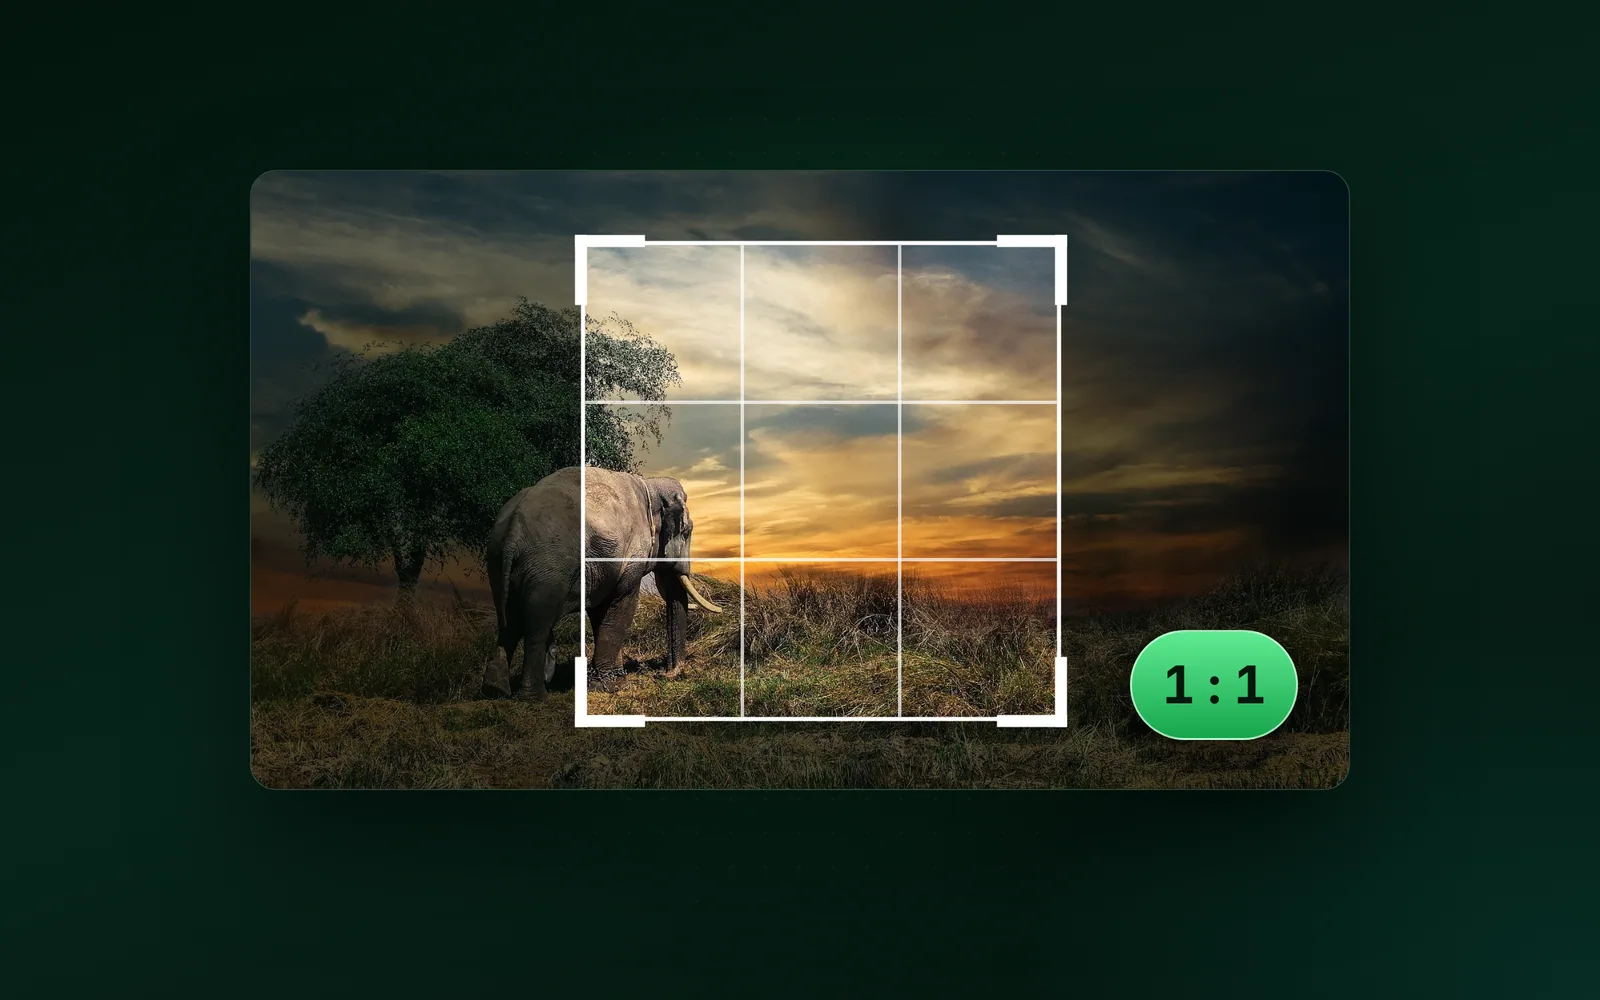
Photoshop 2026 crops with the Crop tool. Press C and drag the handles around the part to keep. Then press Enter on Windows or Return on a Mac. These are the steps on Adobe’s Crop photos help page, last updated on 23 February 2026. They match version 27, which Adobe’s release notes list from 27.0 in October 2025 to 27.11 in September 2026.
Open the image and select the Crop tool
Press C, or click the Crop tool in the toolbar. A crop border with handles appears around the whole image.
Pick a ratio or a size on the options bar
The menu at the left of the options bar holds the ratios and W × H × Resolution. Ratio, the first entry, crops freely.
Drag the handles, or draw a new box
Drag a corner or an edge handle inward. Or drag across the image to draw a fresh crop box.
Move or rotate the crop
Drag inside the box to move the image under it. Hover just outside a corner and drag the curved arrow to rotate.
Press Enter or Return to crop
Or select Done on the Contextual Task Bar. Photoshop crops every layer of the document to the box.
Crop an image on Photoshop to a ratio
A ratio locks the shape of the crop box, and you choose how much of the photo it covers. Adobe’s Crop tool options page lists the presets in the menu. We cut each one from the centre of our 9.8 MB camera photo, 4964 × 2782 pixels, as large as it fits:
| Preset (Adobe’s words) | What Adobe says it does | Pixels kept | Share kept | JPG at Auto |
|---|---|---|---|---|
| Original Ratio | Maintains the image’s original aspect ratio | 4964 × 2782 | 100.0% | 605.5 KB |
| 1 : 1 (Square) | Crops to a perfect square | 2782 × 2782 | 56.0% | 366.8 KB |
| 4 : 5 (8 : 10) | Crops to a portrait ratio for print or social media | 2226 × 2782 | 44.8% | 293.0 KB |
| 5 : 7 | Crops to a standard photo print ratio | 1987 × 2782 | 40.0% | 267.2 KB |
| 2 : 3 (4 : 6) | Crops to a standard 4 × 6 print ratio | 1855 × 2782 | 37.4% | 250.9 KB |
| 16 : 9 | Crops to a widescreen video ratio | 4946 × 2782 | 99.6% | 604.6 KB |
Adobe writes 4 : 5, 5 : 7 and 2 : 3 portrait, tall and narrow. On a landscape photo, each of those keeps under half of the picture: 44.8% for 4 : 5. Type the 2 numbers the other way round and the same shape turns landscape. Then 5 : 4 keeps 70.1%.
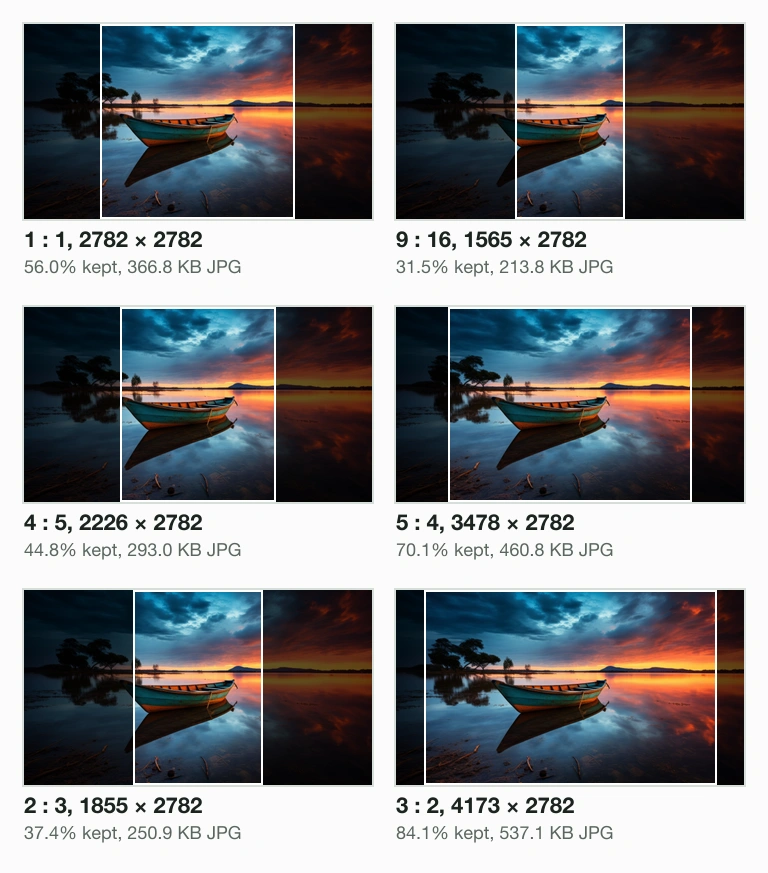
JPG at Auto, by crop
- No crop605.5 KB
- 5 : 4, 70.1% kept460.8 KB
- 7 : 5, 78.5% kept508.1 KB
- 3 : 2, 84.1% kept537.1 KB
- 1 : 1, 56.0% kept366.8 KB
- 4 : 5, 44.8% kept293.0 KB
- 5 : 7, 40.0% kept267.2 KB
- 2 : 3, 37.4% kept250.9 KB
Cropping alone makes the file smaller. Our square kept 56.0% of the pixels and 61% of the bytes: 366.8 KB against 605.5 KB for the whole photo. In a browser, the crop image to square and 4:5 aspect ratio tools set those 2 shapes for you.
How to crop an image in Photoshop to an exact size
Choose W × H × Resolution in the ratio menu, then type the width, the height and the resolution. Adobe’s options page says this preset “crops to a defined width, height, and resolution”. So the crop does 2 jobs at once: it cuts the shape, then it resamples the pixels to the size you typed.
That second job changes the file far more than the cut. We resized each crop to the size a reader would type, with Blinkimg’s engine standing in for Photoshop’s resample:
| Crop | Typed size | Crop at full resolution | At the typed size |
|---|---|---|---|
| 1 : 1 | 1080 × 1080 | 2782 × 2782, 366.8 KB | 87.3 KB |
| 4 : 5 | 1080 × 1350 | 2226 × 2782, 293.0 KB | 98.3 KB |
| 5 : 7 | 1500 × 2100 | 1987 × 2782, 267.2 KB | 177.6 KB |
| 2 : 3 | 1200 × 1800 | 1855 × 2782, 250.9 KB | 132.1 KB |
| 16 : 9 | 1920 × 1080 | 4946 × 2782, 604.6 KB | 140.3 KB |
The square at 1080 × 1080 weighs 87.3 KB, against 366.8 KB at 2782 × 2782. Instagram’s portrait size, 1080 × 1350, came to 98.3 KB.
Never type a size bigger than your crop
A crop that holds fewer pixels than you typed gets enlarged, and enlarging cannot add detail. Adobe’s Image size and resampling page says upsampling “can’t add detail that wasn’t in the original image”. We took the same patch of the boat twice. From the full photo it holds 1080 × 1080 real pixels. From a half-size copy it holds 540 × 540, which we enlarged 2× to 1080 × 1080 with sharp 0.35.4’s bicubic kernel.
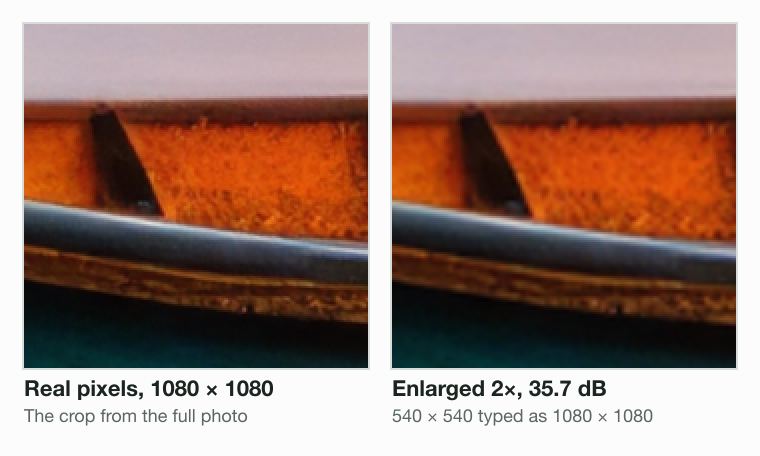
With the width and height in pixels, the resolution only tells a printer how many pixels to put in an inch. Adobe’s Image size page says resolution “doesn’t change the image data”.
Is it better to crop or resize an image?
Crop when the shape must change, and resize when only the size must. Resizing keeps the whole picture; cropping cuts the edges to reach a new shape. We made our photo 1080 pixels wide both ways:
- Resized only: 1080 × 605, the whole photo, 56.7 KB.
- Cropped to 1 : 1, then resized: 1080 × 1080, the centre square, 87.3 KB.
The square holds more pixels, so it weighs more, but only it fits a square slot. A form or a profile that names exact pixels needs both: crop to the shape, then resize. For a size alone, the image resizer keeps the whole picture.
Does a site or form ask for exact pixels?
- Yes
Does your crop hold at least that many pixels?
- Yes
W × H × Resolution
Type the width and height in pixels.
- No
Crop with a ratio, keep the size
Typing a bigger size enlarges and blurs.
- Yes
- No
Should the crop touch only one layer?
- Yes
A layer mask
The Crop tool always cuts every layer.
- No
A ratio preset, or Ratio
Ratio crops freely.
- Yes
Crop without losing the edges: Delete Cropped Pixels
Delete Cropped Pixels decides whether the cut edges are gone or only hidden. Adobe says the setting “permanently removes areas outside the crop, but allows editing when turned off”. A 1 : 1 crop of our photo hides 44.0% of its pixels, and with the box unticked they stay in the document.
- Unticked: select the Crop tool again later and drag the handles out. The hidden pixels come back.
- Ticked: the edges are deleted when you press Enter. Only Undo, or the original file, brings them back.
- A JPG or PNG copy holds only the crop. Adobe’s Save files page describes File, Save a Copy as the way to make “a flattened JPEG or PNG” without changing the original. File, Export, Export As also saves a PNG, JPG, GIF or SVG, with a quality setting for JPG.
The Crop tool can also make the canvas bigger. Drag the handles outward past the image and press Enter, as Adobe’s Resize the canvas page shows. The Fill menu on the options bar then decides what fills the new space.
Straighten a photo or fix its perspective while cropping
The Crop tool straightens a tilted photo in the same pass. Adobe’s Straighten tilted photos page gives the steps:
Select the Straighten tool on the options bar
It appears while the Crop tool is active.
Drag a line along an edge that should be level
A horizon or a roofline works. Photoshop turns the crop to level that line.
Adjust the box, then press Enter or Return
Or select Done on the Contextual Task Bar.
Rotating leaves empty corners. Choose Content-Aware Fill in the Fill menu on the options bar, and Photoshop fills them for you as it crops. Adobe notes one condition: Use Classic Mode must be off.
For a building or a document shot at an angle, use the Perspective Crop tool. Hold down the Crop tool in the toolbar and pick it from the group. Draw a box around the object, drag its 4 corners onto the object’s edges and press Enter. Photoshop squares the object up as it crops.
How to crop part of an image or a single layer
The Crop tool always cuts the whole document. For a part of the picture, or for one layer, Photoshop has 3 other routes.
Crop to a selection with Image, Crop
Draw a selection with the Rectangular Marquee tool around the part to keep. Then choose Image, then Crop. Adobe’s Adjust crop, rotation, and canvas size page gives those 2 steps. Photoshop cuts the document to the selection’s bounds.
Trim empty edges with Image, Trim
Image, then Trim, crops away a plain border for you. Adobe lists 3 choices: Transparent Pixels, Top Left Pixel Color or Bottom Right Pixel Color. You can trim the top, bottom, left or right edge, or all 4.
Crop one layer with a layer mask
You can’t crop a single layer with the Crop tool, Adobe’s page on cropping layers says. Use a layer mask instead:
Select the part of the layer to keep
Use the Rectangular Marquee, the Elliptical Marquee for a circle, or the Lasso for a free shape.
Add a layer mask
Click Add Layer Mask in the Layers panel. The mask hides everything outside the selection.
Paint the mask to adjust it
Black on the mask hides, white shows. Nothing is deleted, so you can change the crop later.
Crop an image without Photoshop
Photoshop costs US$22.99 a month for the single app on an annual plan. That is the price Adobe’s page showed on 6 October 2026. For a ratio or an exact size, a browser does the same cut. The cropper below locks a ratio or takes a width × height, then saves one compressed copy.
Your computer can crop too. On a Mac, read how to crop an image on a Mac with Preview. On Windows, how to resize an image in Paint also crops with Select and Crop.
Read the full guide: How to reduce image file size on any device.
Questions
- How do I crop an image in Photoshop?
- Press C to select the Crop tool, and a crop border appears around the image. Pick a ratio on the options bar, or choose Ratio for a free crop. Drag the corner or edge handles around the part to keep. Press Enter on Windows or Return on a Mac, or select Done.
- How do I crop a part of an image?
- Draw a selection around the part with the Rectangular Marquee tool. Then choose Image, then Crop, and Photoshop cuts the document to that selection. To keep a free shape instead, select it with the Lasso tool and add a layer mask, which hides everything outside the selection without deleting it.
- How do I cut off part of an image in Photoshop?
- To cut off an edge, use the Crop tool: press C, drag the handle on that side inward and press Enter. The Crop tool only ever removes the outer edges. To hide an object inside the picture, select everything else and add a layer mask, which hides without deleting.
- How do I freehand crop a picture in Photoshop?
- For a free rectangle, choose Ratio in the menu on the options bar, which crops freely, then drag any handle. For a free shape, draw it with the Lasso tool and click Add Layer Mask in the Layers panel. The mask hides the rest, and you can repaint it later.
- Why can’t I crop in Photoshop?
- Check what the Crop tool is set to. A W × H × Resolution preset fixes the size of the box, so pick Ratio in the menu to crop freely. Image, Crop needs a selection first. And the Crop tool cannot crop one layer alone, so use a layer mask for that.
- How do I crop an image in Photoshop without cropping the other layers?
- Use a layer mask, because the Crop tool always cuts every layer of the document, Adobe says. Select the layer, draw a selection around the part to keep and click Add Layer Mask. The other layers stay whole, and the masked layer keeps its hidden pixels for later.
- Is it better to crop or resize an image?
- Crop to change the shape, resize to change the size. We made our photo 1080 pixels wide both ways. Resized only, it stayed whole at 1080 × 605 and 56.7 KB. Cropped to a square first, it came to 1080 × 1080 and 87.3 KB, ready for a square slot.
- How do I crop an image in Photoshop to a specific size?
- Choose W × H × Resolution in the ratio menu on the options bar. Type the width and height in pixels, place the box and press Enter. Photoshop crops and resamples in one step. Blinkimg's engine saved our square at 1080 × 1080 as an 87.3 KB JPG at Auto.
- How do I crop an image in Photoshop on a Mac?
- The steps are the same as on Windows. Press C for the Crop tool, pick a ratio or a size on the options bar and drag the handles. Then press Return, not Enter, or select Done. Save a JPG or PNG with File, Save a Copy, which leaves the original document as it was.
- How do I crop an image in Photoshop without losing quality?
- Cropping itself costs no quality: it only removes pixels. The loss comes from enlarging and from re-saving as JPEG. Never type a size bigger than the crop holds. Our 540 × 540 crop enlarged to 1080 × 1080 scored 35.7 dB PSNR against real pixels. Save a PNG to keep every pixel.
- Does cropping an image reduce its file size?
- Yes, because fewer pixels need fewer bytes. Blinkimg's engine saved our whole camera photo as a 605.5 KB JPG at Auto. The 1 : 1 crop kept 56.0% of the pixels and came to 366.8 KB. Resized to 1080 × 1080, the same square fell to 87.3 KB.
- How do I crop an image into a circle in Photoshop?
- Use the Elliptical Marquee tool, not the Crop tool, which only cuts rectangles. Draw the circle around the part to keep, then click Add Layer Mask to hide everything outside it. Crop the canvas to a square around the circle, and save a PNG so the corners stay transparent.
- How do I undo a crop in Photoshop?
- Choose Edit, then Undo, straight after the crop. If Delete Cropped Pixels was unticked, the edges are only hidden: select the Crop tool again and drag the handles back out. If the box was ticked, the cut edges are deleted, and only Undo or the original file brings them back.